Thursday, September 18, 2014

Clam Chowder

CLAM CHOWDER
So in my last post i left you with an admonition about hidden salt only to fall into that selfsame trap while making dinner…. mea culpa. I made the mistake of not checking the nutrition label on two products that i had never used that went into last nights chowder. I mean yes, of course i had used both clam juice and bacon, but not these particular ones and as we should all know not all brands are created equal. Corporations spend oodles of dollars to convince of just this fact. ahemmmm…. It gets worse, not only did i not check out the product but i seasoned before i tasted, yup, all around i would call that a strike out. Luckily i did not ruin the chowder with an overabundance of salt, far from it, however there was too much salt.

I mentioned in the transitions post that Geresbecks does the eating public a real favor by packaging their cheese and meat ends from the deli, they also package slab bacon the same way. Incredibly good food products at very good prices. Not to mention the added benefit of not waiting at the deli counter which is always crowded!

So, some great slab bacon to start your chowder with - dice up a chunk and fry it until it starts to color and crisp.
Remove the bacon, drain and set aside. I always take my bacon out at this point because i want it to retain its crispy crunchy nature, if you leave it it the chowder it will lose the crunch.
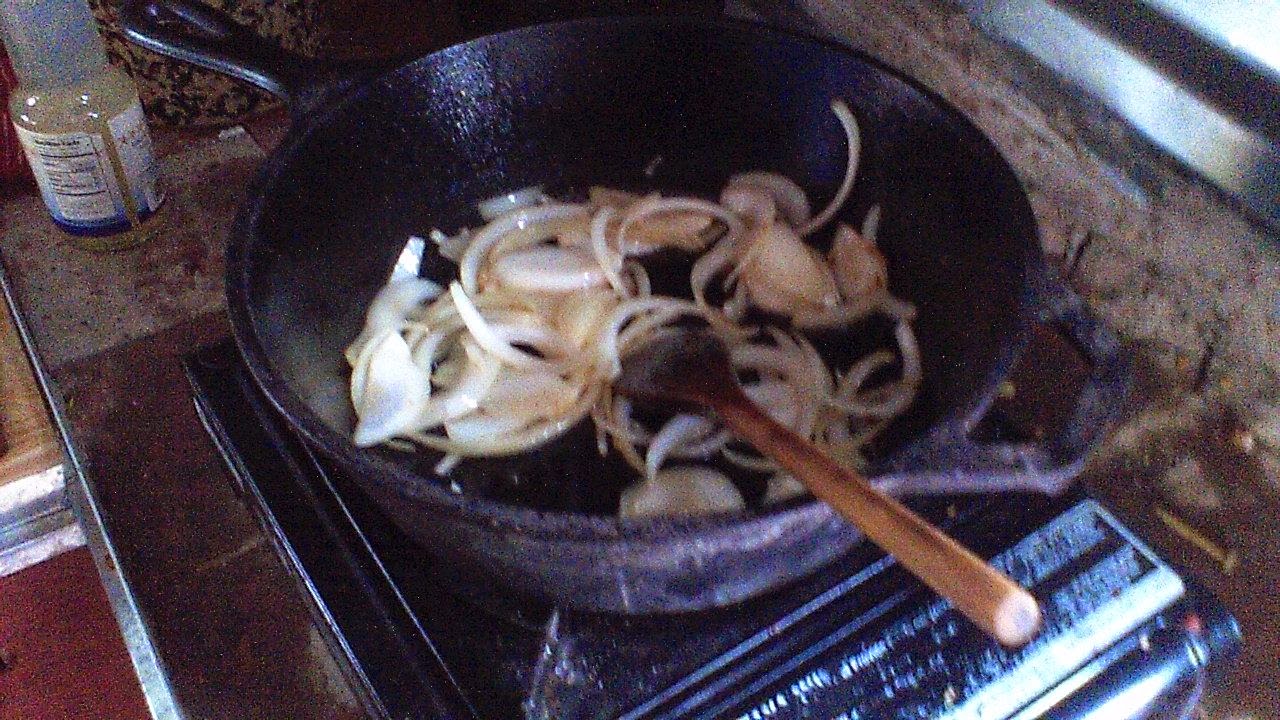
Next sauté some chopped or slivered onion, about half of a “medium” one, add slice mushrooms, i usually use four medium large white ones, portabellas would be fine as well, sauté the mushrooms until they start to release liquid, add a couple of diced cloves of garlic, a large red-skinned potato and chopped celery. After all the veggies look well coated with oil and are starting to cook add some dry white wine, clam juice(or chicken stock), season with thyme, paprika and coarse ground black pepper. You should have enough liquid to slightly more than cover your veggies. Simmer until the veggies are crisp tender.

Before adding the clams you should soak them in fresh cold water for about a half hour. This will allow them to release most of the grit they have in their tummies and let you see if any of them are unusable, if they will not close you can not use them!
Pop them on top of the simmering veggies, cover them, preferably with a glass lid so  you can see whats going on, and watch them carefully.
You do want to pull them off the heat as they open. Place the cooked clams on a plate or in a shallow bowl and allow them to cool enough so you can handle them.
Make sure that your stew is at a low simmer at this point. You will want to add approximately a cup of milk, your choice, cream, half and half or whatever. I usually use the 2 percent which we use for cereal. This is a very rich dish as it is, it really does not need the extra richness from the cream or half and half, but like i said, your choice. Make sure you bring the mixture up to a simmer, but don’t let it boil, as the milk fats will separate and look funky. It will not affect the taste however. At this  point i add back in the bacon. I like to serve the stew with whole clams, i know a lot of people like to chop them up, but they are so lovely when they are cooked to perfection and i feel like i have gotten more clam for my money when i get to eat them whole, regardless of the fact that minced or whole it is the same amount of clam. I never put the clams back into the stew wether i mince them or leave them whole. You have a very narrow window between perfectly done to chewy tough and inedible.
Besides which if you simply put them in the bottom of the bowl after shelling them you can make absolutely sure that everyone gets exactly the same amount. (four is good, six is overkill). At this point i turn the heat off, add some worchestshire sauce or fish sauce. I garnished this chowder with roasted red bell pepper. Serve a chowder like this with a dry but fruity white wine and a cold crispy veggie,(radishes would be excellent). And of course a crusty bread. Awesome! Enjoy.

More later,
Morgainne


Saturday, September 13, 2014

Transitions

ONBOARD COOKING: TRANSITIONS

Although we are still experiencing the summer’s bounty the weather and the way we eat will change soon. We are starting to see pumpkins, squash and the cool weather greens such as kale and cabbage. Soon fresh vine ripened tomatoes will be a fond memory. Fall and cooler weather means we will be doing more inside cooking. I am sure that we will also appreciate the extra heat that even our little one burner cook top will generate.

Take today for example: we made plans with friends late night over dutch oven pizza to venture down to the celebrations surrounding the bicentennial of the war of 1812. We were going to leave around noon; it's about an hour by boat, watch the Blue Angels and stay for the fireworks. 

It’s been raining since 11 a.m. 

So lunch today; instead of sandwiches on board turned into one of the ultimate comfort foods: mac and cheese. Of course it wasn’t just your mother's ordinary mac and cheese, but my own gourmet shipboard version. It’s called "what's in the frig"! Hmmm— about 1/4# of salt and pepper sausage (made fresh at Geresbecks) 1/2 an onion from the veggie bin, garlic, 1/2 a jalapeño, also from the veggie bin, mushrooms (4), and the leftover tomato garlic infused oil that i dressed the pizza tomatoes with last night. Add in the 1/2 tomato, also leftover pizza ingredients, the end of the cheese ends; another great Geresbecks offering, along with their luncheon meat ends, some suitable seasonings, thyme, oregano and basil. Voila! You have, even using only one burner, a soul and tummy satisfying meal which only took a half hour to make. An energy saving tip i learned years ago works really well if you only have one burner to use but two pots to cook. Start your starch first: ( potatoes, rice or pasta). Each of these will cook when off the flame. Bring your water to a boil and depending on what you’re cooking between a minute and five after you achieve a roiling boil you can take the covered pan off the flame and it will continue to cook on its own while you cook the sauce, stir fry, whatever. Pasta cooks the fastest, rice the slowest but it always seems to work out.

Please note that it wasn’t an oversight; i did not add any salt or pepper to the seasoning. With the ingredients i used there was plenty of salt; salt sources included the sausage, the cheese, and the seasoned oil from the tomatoes. We live in a society that as a general rule ingests way too much salt than is good for us. It pays as a cook to be vigilant regarding hidden sources of sodium.

Good eating to you.

More late,

Morgainne

Sunday, September 7, 2014

The Dog Days of Summer

ONBOARD COOKING: THE DOG DAYS OF SUMMER


In Maryland the end of August heralds a super abundance of incredible fruits and vegetables. If you live here and don’t take advantage of the local produce easily available at farm stands and local markets, well, shame on you. You go right ahead and eat those pallid, overpriced supermarket veggies. I’ll eat your share of the good stuff. Check out the local options that we’ve found so far (listed below) and send us information about ones we haven’t found yet.

If you haven’t noticed by now i am not real big on exact measurements for recipes, or even really very strictly married to an exact list of ingredients. Mungo laughs at me all the time - i will read or hear about a new recipe and say wow! that sounds really tasty, i want to try this for dinner tonight and then very calmly substitute 3 out of 5 key ingredients; still coming up with a very tasty if not better tasting version of the original recipe. How can i do this? Well, on the most basic level its because i thrust my food sense and my taste buds. Okay so i read cookbooks the way other people read novels. I look at a recipe and understand the basic logic of the five tastes (sweet, salty, bitter, sour and umami), how the textures, tastes, shapes and colors relate.

A composed vegetable sandwich is a favorite lunch time treat for me and Mungo. Who wants a heavy, hot meal in the torrid temperatures of late summer? Even on the river mid-day temps and humidity often approach the triple digits. Two of these sandwiches with all their possible variations are the VEGGIE BAGUETTE of Mungo Jerry's Fat Cat Cafe fame and smorrebrod, the luscious veggie versions of Danish open face sandwiches. Both of these sandwiches are easy to make. They must, it goes with out saying, be made with only the ripest tomatoes, peppers and cucumbers.

The filling for the Veggie Baguette can be varied to suit your tastes and seasonal availability but should always include sweet onion absolutely ripe tomatoes, fresh, sweet red (or yellow, or orange…) peppers, good cured olives, fresh basil, some type of marinated or pickled veggie, a mild semi-soft cheese of your choice. Fresh mozzarella is my first choice, but store bought block mozzarella, swiss or havarti will do. You should use the best extra virgin olive oil you can afford and of course the bread. The bread must have a good dense crust and crumb. This cannot be a “traditional” soft, puffy white sandwich bread. If you are buying your bread most markets have bread baked on premise. Ciabatta or portuguese rolls are good choices. Most of the French, Italian or sub rolls are too soft.

Get your ingredients together, wash and dice all of your veggies. It’s always tempting to cut paper thin slices of peppers, onions and tomatoes. Its pretty yes, but from a practical eating point of view messy. I recommend a medium dice for all of your ingredients. Slice your bread in half and try to compress the cut surfaces. I don;t tear out a hollow, you could, but i like to eat all of my bread. Drizzle the bottom piece of bread generously with the olive oil. rub it into the bread. Go ahead and lick your fingers. If you don’t like the taste of your oil y ou should be using a different one. If you don’t use a lot of olive oil it is a good idea to taste it occasionally  as it can develop off flavors. Lay down a layer of basil chiffonade that covers the oil (3 to 5 large leaves for two sandwiches). Add some dice onion, bell pepper (i use roasted bottled peppers in the winter when the ‘fresh’ ones in the supermarkets becomes both tasteless and exorbitantly expensive). Next comes chopped olives and maybe some lightly pickled cucumbers(not pickles) or artichoke hearts or pepperoncini……choose one. I always put my cheese down next and like to use slices that cover the bottom layer instead of shredded cheese as the slices act as caps to hold the diced veggies in place. Next  comes a generous layer of tomato, think major ingredient here. When i can’t get fresh ripe tomatoes, roughly October through June i go without, or use sun dried tomatoes packed in olive oil. Salt and pepper to taste, than a drizzle of balsamic vinegar and more olive oil. Top with the other half of the bread and gently press everything together. Wrap tightly and press it together some more. Weigh it down and let sit for up to three hours, covered, at room temperature.

The class open face sandwich of Denmark unlike most American sandwiches is meant to be eaten with a knife and fork. They are beautiful works of art. When i make these sandwiches my preference for the bread is a thin, square pumpernickel or rye. This bread is also the traditional choice for these sandwiches. These breads are common all over Germany and Scandinavia. You can often find them at the deli counter in a supermarket. Aldi’s seems to carry these breads year round and at half the price of the big box stores. I usually cut the bread into halves. cocktail squares make a very nice serving size as is. The biggest difference between the french baguette style sandwich and smorrebrod is how you use the fat in the sandwich. With the veggie baguette you want the olive oil to work its way into the bread mingling the flavors and juices into a almost creamy texture in the bread. In the smorrebrod the fat acts as a barrier to this process. I’ve seen and tasted a wide variety of fats here, most common would be a thin slice of a semi-hard cheese. The sky’s the limit here and your choice should be based on whats affordable and fresh locally. I used softened left over brie on the example shown here. 


I got carried away here, usually there will only be a couple of ingredients on each one, but, what the hey! The principle is a clean fresh crisp rase instead of the slow gentle, infused melding of the veggie baguette. So say, cheese, lightly pickled fresh cucumber, a few twisted slivers of onion, fresh dill, salt and pepper, often served with a few crumbs of smoked salmon, or salmon roe. Strictly speaking most smorredbrod is not vegetarian as fine thin slices of smoked, cured or simply roasted meats are standard. Meat pastes are common as well, with liver predominating. Than of course are the shrimp salads, the pickled and smoked fish. All of which are garnished with the freshest herbs and appropriate pickles. Delicious, eat, drink and be merry! Skoal!


Make sure you check out our other blogs of the life Aquatic:  Floating Empire is a saga of the building and adventures of our shantyboat "Floating Empire", Life, Art, Water is my (Morgainne) blog of being a working artist living on the river.  Got any questions or comments?  New recipes?  Leave us a note in the comments.  We promise to get back to you.

Morgainne


Thursday, September 4, 2014

Beef Ribs

Dinosaur Ribs

AKA Beef Back Ribs AKA “Will you look at the size of those things?  What is this, a rerun of the Flintstones?”

Doing beef ribs can be a challenge.  As a BBQ, they are amazingly beefy, flavorful, and will stand up to just about any kind of rub, sauce, or dressing you care to put on them.  On the down side, though, they can be stringy, tendon-y, and tough as shoe leather.  Cooking on an open grill is a special challenge due to the lack of heat control.

Let me say up front, no, we don’t precook them in a conventional oven for hours and no, we don’t boil the things.  Boiling will render the meat tender.  It will also render it rather flavorless.

There are four keys to getting good grilled beef ribs.

First: Remove the membrane.  This is a solid sheet of protein on the back side of the ribs.  Exposed to heat, you could bungee jump using the thing.  To peel it off, use a blunt knife like a butter knife to loosen the edge at the end of one of the bones, grab hold of the membrane (using a cloth, paper towel, fish skinner, or pliers will help you hold on to it.  Trust me.) and gently rip it off.  It's a pain in the butt, but the payoff is you get to keep most of your teeth at dinner.

Second:  Brining:  You can use either a wet brine (water, salt, sugar) or a dry brine (a simple salt rub).  We use the latter, rubbing the meat with salt all over the night before.  Brining does some wonderful chemical tricks with the meat, allowing the surface to hold onto more water during cooking and making the meat far more moist and tender.  We use the same trick with chicken and pork, always to good results.

Third:  The Rub.  Our Middle River Rub recipe is included below.  Give yourself time for the rub to sit on the meat for at least an hour or so.
 Yeah we made a LOT of rub for the Labor day party
 No, not wine, just a used bottle with olive oil
Ahh, the joys of the Middle River Rub


Fourth:  Low and Slow:  These things take some time to cook.  A couple of hours is desirable at around 180-200 degrees F.  

To keep the temperature in line, we use aluminum pans to cover the meat and a water filled drip pan directly under the ribs, with the fire used as indirect heat around the fringes.  Need additional control?  Toss another tin pan over the coals to damp down the heat a bit.


Even with the best of cooking, Beef Ribs can be at the very least firm flesh, not the sort of buttery, melt off the bone texture you get with pork, but the flavors are exceptional bordering on amazing.  With a good rub and slow cooking, they’re a treat.  Besides, you get to feel like Conan the Barbarian ripping the flesh off the bones.  Now what could be better than that?


Middle River Rub:

First, rub the (hopefully brined) meat with lemon juice and olive oil.

The Rub:

(takes about 4-6 TBL of the rub per rack of beef ribs, but you should use as much as will stay on the meat)

3 TBL Smoked Paprika
3 TBL ground chili (ancho is what we used.  1 Large Dried Chili is about enough)
3 TBL Black Pepper
3 TBL Brown Sugar

1 TBL Garlic Powder
1 TBL Cumin Seed
1 TBL Mustard Seed

1 tsp Ground Ginger
1 tsp Ground Allspice

1/2 of a whole nutmeg, grated

As much hot pepper flakes as you wish.  We used about 1 TBL

First toast the Chili, cool, and grind.  Then toast the cumin seeds until fragrant, toast the mustard seeds until they begin to pop.  Grind these as well.

Mix cooled dried ingredients and put in a sealed container.


Then drive your neighbors crazy with the smell of these cooking.  Yum.

Hey, check out our other blogs and the sagas of the Shantyboat "Floating Empire" over at floatingempire.blogspot.com and Life, Art, Water, you'll be glad you did :)

More stuff shortly

M