Friday, December 19, 2014

COOKING WITH A MALAYSIAN FLAIR

COOKING WITH A MALAYSIAN FLAIR

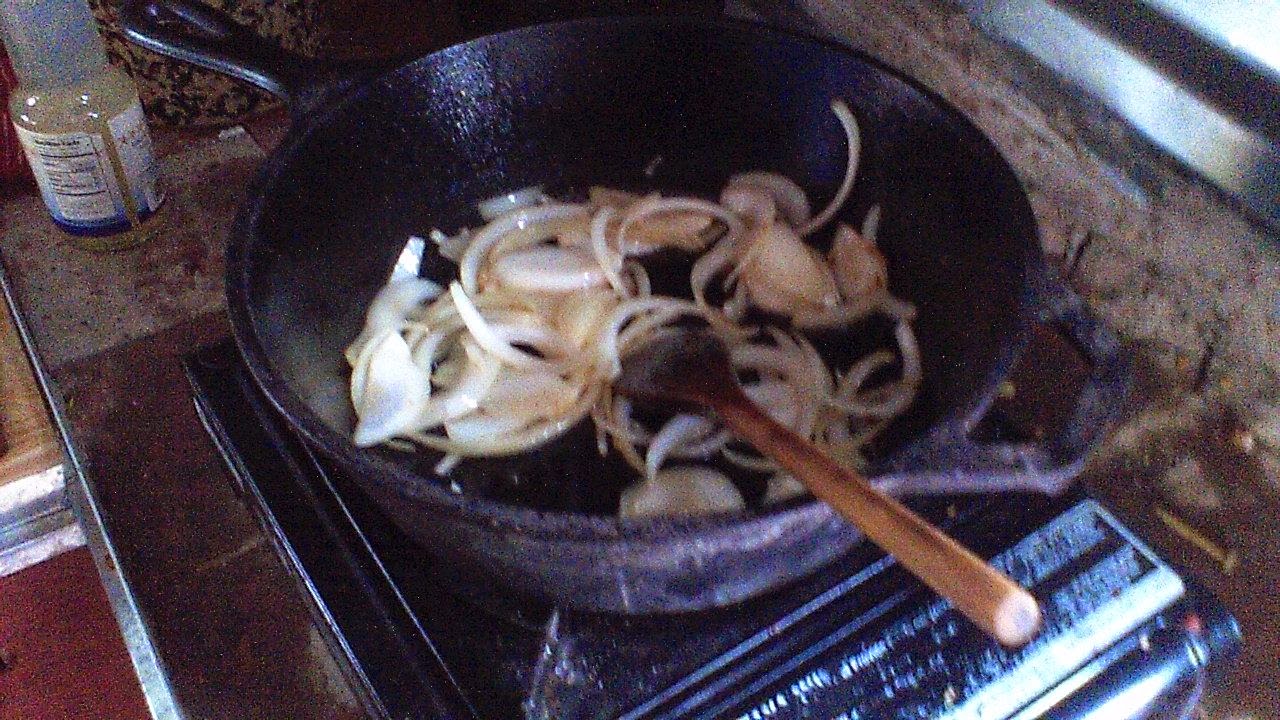
Ooops! I guess we’ve simply been so busy living our lives here on the Empire to post about what we’ve been eating; and of course we have been eating, and eating well i might add. The addition of our Butterfly kerosene cook top has been a real plus. I still like our little butane stove top, however as the temperatures fell below 50 degrees we discovered that sadly its performance fell way off. The pressurized  gas stoves, just like Mungo, don’t like the cold weather. Mungo’s research on alternatives led us in two directions; one, alcohol and two, kerosene. We dismissed the alcohol almost immediately because in Maryland you can’t get the high test stuff due to a relatively new law that forbids the sale of pure alcohol (can’t have irresponsible people drinking it) unless it has a methyl additive, which creates nasty fumes. Besides it doesn’t put out the BTUs. This led us to Kerosene, the fuel of choice for most of Asia, both for heating and cooking.


Speaking of Asia: i spent the last week re-reading one of my favorite cookbooks; one of only four i allowed myself onboard, ‘The Cradle of Flavor’, by James Oseland. This book is a lovingly written survey of home cooking from the Spice Islands. If any of you are interested in learning about the food and cooking of Indonesia, Malaysia and the other islands this could be the book for you. He includes a thorough explanation of ingredients and methods complete with approximate locations in the store as well as possible spelling variations by ingredient. Awesome job!

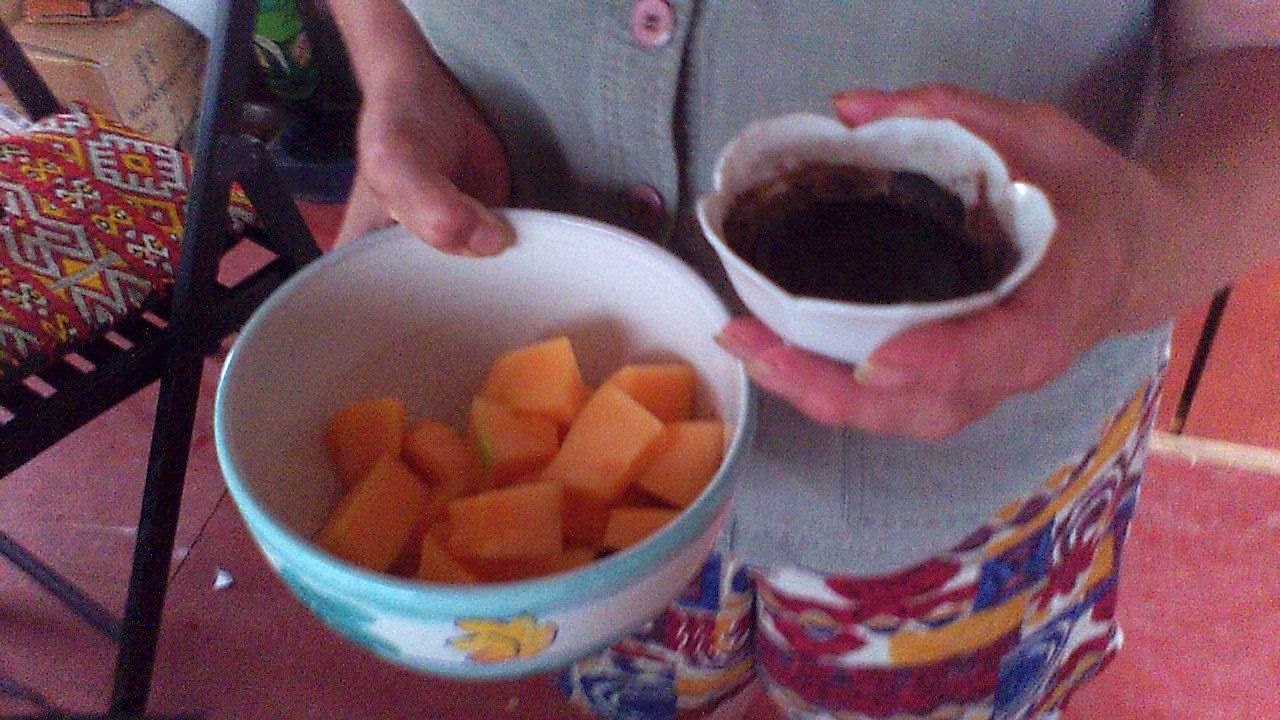
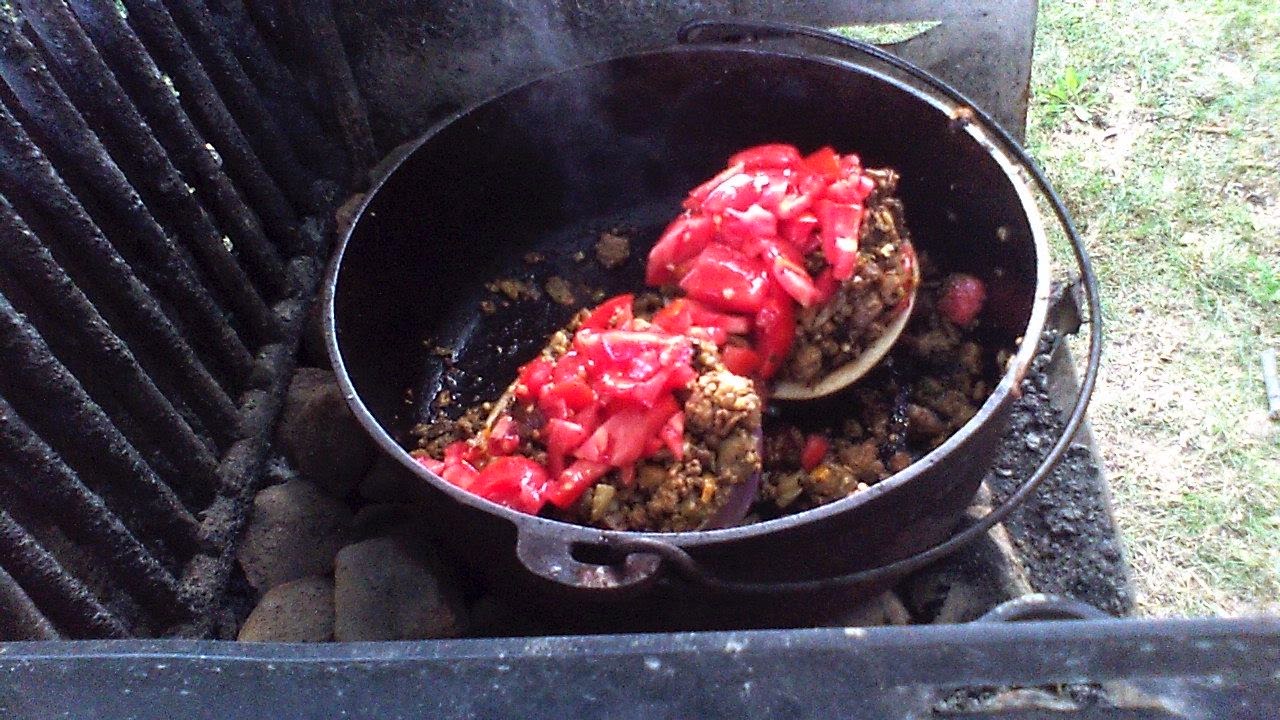
So last night we had a beautiful fish and greens dish for dinner. Don’t try to find the recipe in the book, it’s not there. I am an intuitive cook and an unabashed experimenter. It bothers me not at all to alter recipes i have never tried before. Recipes after all are for the most part guidelines, not mandatory rules. Well, except for baking, i usually pay attention when i am making sweets. Anyhow there are a couple of basics to keep in mind when you are cooking Spice Islands style: 1. keep a balance between sweet, salty, sour and hot and 2. Virtually all of your flavoring happens upfront. Almost all of the recipes start with a flavoring paste and go on from there. This is an important difference between this style of cooking and most others, particularly western styles. Most of the aromatics are ground together to form a paste that ranges in texture from salsa crude and mashed potatoes; the paste is than gently saluted in oil util the air in the galley is perfumed with the heavenly aromas of chiles, shallots, ginger, nutmeg and whatever else you’ve used. Unlike western cooking after the flavoring paste the ingredient list is simple; usually only one two ingredients per dish, all the better to showcase the flavors. Another important difference is the temperature that the food is served, warm, not hot, straight out of the and. A typical dish should be allowed to rest anywhere from ten to thirty minutes. This brings all of the flavors together and allows you to taste the incredibly delicious layers of spices. The rice of course is served piping hot. So, last nights dinner, pictured here is a hybrid dish featuring kale with garlic and chilies (greens are served at just about every meal) partnered with a mild white fish, Basa in this case, with a delicious range of spices, nutmeg, lemongrass, turmeric, shallots, and coriander. i served this with a lovely cucumber pickle.


Yum yum!

more later,

Morgaine

Friday, November 21, 2014

Stalling for Bandwidth

Hi folks.

Just a note to say we're sorry for the lack of posts recently.  We're patiently (not) waiting for our Marina to finish installing fiber optic broadband before uploading SEVERAL entries we have for this Blog.  Please stay tuned, and we'll have several videos, new recipes, and some cool new ideas for small kitchens for you......just as soon as they finish trenching the parking lot for the cable.

M

Thursday, September 18, 2014

Clam Chowder

CLAM CHOWDER
So in my last post i left you with an admonition about hidden salt only to fall into that selfsame trap while making dinner…. mea culpa. I made the mistake of not checking the nutrition label on two products that i had never used that went into last nights chowder. I mean yes, of course i had used both clam juice and bacon, but not these particular ones and as we should all know not all brands are created equal. Corporations spend oodles of dollars to convince of just this fact. ahemmmm…. It gets worse, not only did i not check out the product but i seasoned before i tasted, yup, all around i would call that a strike out. Luckily i did not ruin the chowder with an overabundance of salt, far from it, however there was too much salt.

I mentioned in the transitions post that Geresbecks does the eating public a real favor by packaging their cheese and meat ends from the deli, they also package slab bacon the same way. Incredibly good food products at very good prices. Not to mention the added benefit of not waiting at the deli counter which is always crowded!

So, some great slab bacon to start your chowder with - dice up a chunk and fry it until it starts to color and crisp.
Remove the bacon, drain and set aside. I always take my bacon out at this point because i want it to retain its crispy crunchy nature, if you leave it it the chowder it will lose the crunch.
Next sauté some chopped or slivered onion, about half of a “medium” one, add slice mushrooms, i usually use four medium large white ones, portabellas would be fine as well, sauté the mushrooms until they start to release liquid, add a couple of diced cloves of garlic, a large red-skinned potato and chopped celery. After all the veggies look well coated with oil and are starting to cook add some dry white wine, clam juice(or chicken stock), season with thyme, paprika and coarse ground black pepper. You should have enough liquid to slightly more than cover your veggies. Simmer until the veggies are crisp tender.

Before adding the clams you should soak them in fresh cold water for about a half hour. This will allow them to release most of the grit they have in their tummies and let you see if any of them are unusable, if they will not close you can not use them!
Pop them on top of the simmering veggies, cover them, preferably with a glass lid so  you can see whats going on, and watch them carefully.
You do want to pull them off the heat as they open. Place the cooked clams on a plate or in a shallow bowl and allow them to cool enough so you can handle them.
Make sure that your stew is at a low simmer at this point. You will want to add approximately a cup of milk, your choice, cream, half and half or whatever. I usually use the 2 percent which we use for cereal. This is a very rich dish as it is, it really does not need the extra richness from the cream or half and half, but like i said, your choice. Make sure you bring the mixture up to a simmer, but don’t let it boil, as the milk fats will separate and look funky. It will not affect the taste however. At this  point i add back in the bacon. I like to serve the stew with whole clams, i know a lot of people like to chop them up, but they are so lovely when they are cooked to perfection and i feel like i have gotten more clam for my money when i get to eat them whole, regardless of the fact that minced or whole it is the same amount of clam. I never put the clams back into the stew wether i mince them or leave them whole. You have a very narrow window between perfectly done to chewy tough and inedible.
Besides which if you simply put them in the bottom of the bowl after shelling them you can make absolutely sure that everyone gets exactly the same amount. (four is good, six is overkill). At this point i turn the heat off, add some worchestshire sauce or fish sauce. I garnished this chowder with roasted red bell pepper. Serve a chowder like this with a dry but fruity white wine and a cold crispy veggie,(radishes would be excellent). And of course a crusty bread. Awesome! Enjoy.

More later,
Morgainne


Saturday, September 13, 2014

Transitions

ONBOARD COOKING: TRANSITIONS

Although we are still experiencing the summer’s bounty the weather and the way we eat will change soon. We are starting to see pumpkins, squash and the cool weather greens such as kale and cabbage. Soon fresh vine ripened tomatoes will be a fond memory. Fall and cooler weather means we will be doing more inside cooking. I am sure that we will also appreciate the extra heat that even our little one burner cook top will generate.

Take today for example: we made plans with friends late night over dutch oven pizza to venture down to the celebrations surrounding the bicentennial of the war of 1812. We were going to leave around noon; it's about an hour by boat, watch the Blue Angels and stay for the fireworks. 

It’s been raining since 11 a.m. 

So lunch today; instead of sandwiches on board turned into one of the ultimate comfort foods: mac and cheese. Of course it wasn’t just your mother's ordinary mac and cheese, but my own gourmet shipboard version. It’s called "what's in the frig"! Hmmm— about 1/4# of salt and pepper sausage (made fresh at Geresbecks) 1/2 an onion from the veggie bin, garlic, 1/2 a jalapeño, also from the veggie bin, mushrooms (4), and the leftover tomato garlic infused oil that i dressed the pizza tomatoes with last night. Add in the 1/2 tomato, also leftover pizza ingredients, the end of the cheese ends; another great Geresbecks offering, along with their luncheon meat ends, some suitable seasonings, thyme, oregano and basil. Voila! You have, even using only one burner, a soul and tummy satisfying meal which only took a half hour to make. An energy saving tip i learned years ago works really well if you only have one burner to use but two pots to cook. Start your starch first: ( potatoes, rice or pasta). Each of these will cook when off the flame. Bring your water to a boil and depending on what you’re cooking between a minute and five after you achieve a roiling boil you can take the covered pan off the flame and it will continue to cook on its own while you cook the sauce, stir fry, whatever. Pasta cooks the fastest, rice the slowest but it always seems to work out.

Please note that it wasn’t an oversight; i did not add any salt or pepper to the seasoning. With the ingredients i used there was plenty of salt; salt sources included the sausage, the cheese, and the seasoned oil from the tomatoes. We live in a society that as a general rule ingests way too much salt than is good for us. It pays as a cook to be vigilant regarding hidden sources of sodium.

Good eating to you.

More late,

Morgainne

Sunday, September 7, 2014

The Dog Days of Summer

ONBOARD COOKING: THE DOG DAYS OF SUMMER


In Maryland the end of August heralds a super abundance of incredible fruits and vegetables. If you live here and don’t take advantage of the local produce easily available at farm stands and local markets, well, shame on you. You go right ahead and eat those pallid, overpriced supermarket veggies. I’ll eat your share of the good stuff. Check out the local options that we’ve found so far (listed below) and send us information about ones we haven’t found yet.

If you haven’t noticed by now i am not real big on exact measurements for recipes, or even really very strictly married to an exact list of ingredients. Mungo laughs at me all the time - i will read or hear about a new recipe and say wow! that sounds really tasty, i want to try this for dinner tonight and then very calmly substitute 3 out of 5 key ingredients; still coming up with a very tasty if not better tasting version of the original recipe. How can i do this? Well, on the most basic level its because i thrust my food sense and my taste buds. Okay so i read cookbooks the way other people read novels. I look at a recipe and understand the basic logic of the five tastes (sweet, salty, bitter, sour and umami), how the textures, tastes, shapes and colors relate.

A composed vegetable sandwich is a favorite lunch time treat for me and Mungo. Who wants a heavy, hot meal in the torrid temperatures of late summer? Even on the river mid-day temps and humidity often approach the triple digits. Two of these sandwiches with all their possible variations are the VEGGIE BAGUETTE of Mungo Jerry's Fat Cat Cafe fame and smorrebrod, the luscious veggie versions of Danish open face sandwiches. Both of these sandwiches are easy to make. They must, it goes with out saying, be made with only the ripest tomatoes, peppers and cucumbers.

The filling for the Veggie Baguette can be varied to suit your tastes and seasonal availability but should always include sweet onion absolutely ripe tomatoes, fresh, sweet red (or yellow, or orange…) peppers, good cured olives, fresh basil, some type of marinated or pickled veggie, a mild semi-soft cheese of your choice. Fresh mozzarella is my first choice, but store bought block mozzarella, swiss or havarti will do. You should use the best extra virgin olive oil you can afford and of course the bread. The bread must have a good dense crust and crumb. This cannot be a “traditional” soft, puffy white sandwich bread. If you are buying your bread most markets have bread baked on premise. Ciabatta or portuguese rolls are good choices. Most of the French, Italian or sub rolls are too soft.

Get your ingredients together, wash and dice all of your veggies. It’s always tempting to cut paper thin slices of peppers, onions and tomatoes. Its pretty yes, but from a practical eating point of view messy. I recommend a medium dice for all of your ingredients. Slice your bread in half and try to compress the cut surfaces. I don;t tear out a hollow, you could, but i like to eat all of my bread. Drizzle the bottom piece of bread generously with the olive oil. rub it into the bread. Go ahead and lick your fingers. If you don’t like the taste of your oil y ou should be using a different one. If you don’t use a lot of olive oil it is a good idea to taste it occasionally  as it can develop off flavors. Lay down a layer of basil chiffonade that covers the oil (3 to 5 large leaves for two sandwiches). Add some dice onion, bell pepper (i use roasted bottled peppers in the winter when the ‘fresh’ ones in the supermarkets becomes both tasteless and exorbitantly expensive). Next comes chopped olives and maybe some lightly pickled cucumbers(not pickles) or artichoke hearts or pepperoncini……choose one. I always put my cheese down next and like to use slices that cover the bottom layer instead of shredded cheese as the slices act as caps to hold the diced veggies in place. Next  comes a generous layer of tomato, think major ingredient here. When i can’t get fresh ripe tomatoes, roughly October through June i go without, or use sun dried tomatoes packed in olive oil. Salt and pepper to taste, than a drizzle of balsamic vinegar and more olive oil. Top with the other half of the bread and gently press everything together. Wrap tightly and press it together some more. Weigh it down and let sit for up to three hours, covered, at room temperature.

The class open face sandwich of Denmark unlike most American sandwiches is meant to be eaten with a knife and fork. They are beautiful works of art. When i make these sandwiches my preference for the bread is a thin, square pumpernickel or rye. This bread is also the traditional choice for these sandwiches. These breads are common all over Germany and Scandinavia. You can often find them at the deli counter in a supermarket. Aldi’s seems to carry these breads year round and at half the price of the big box stores. I usually cut the bread into halves. cocktail squares make a very nice serving size as is. The biggest difference between the french baguette style sandwich and smorrebrod is how you use the fat in the sandwich. With the veggie baguette you want the olive oil to work its way into the bread mingling the flavors and juices into a almost creamy texture in the bread. In the smorrebrod the fat acts as a barrier to this process. I’ve seen and tasted a wide variety of fats here, most common would be a thin slice of a semi-hard cheese. The sky’s the limit here and your choice should be based on whats affordable and fresh locally. I used softened left over brie on the example shown here. 


I got carried away here, usually there will only be a couple of ingredients on each one, but, what the hey! The principle is a clean fresh crisp rase instead of the slow gentle, infused melding of the veggie baguette. So say, cheese, lightly pickled fresh cucumber, a few twisted slivers of onion, fresh dill, salt and pepper, often served with a few crumbs of smoked salmon, or salmon roe. Strictly speaking most smorredbrod is not vegetarian as fine thin slices of smoked, cured or simply roasted meats are standard. Meat pastes are common as well, with liver predominating. Than of course are the shrimp salads, the pickled and smoked fish. All of which are garnished with the freshest herbs and appropriate pickles. Delicious, eat, drink and be merry! Skoal!


Make sure you check out our other blogs of the life Aquatic:  Floating Empire is a saga of the building and adventures of our shantyboat "Floating Empire", Life, Art, Water is my (Morgainne) blog of being a working artist living on the river.  Got any questions or comments?  New recipes?  Leave us a note in the comments.  We promise to get back to you.

Morgainne


Thursday, September 4, 2014

Beef Ribs

Dinosaur Ribs

AKA Beef Back Ribs AKA “Will you look at the size of those things?  What is this, a rerun of the Flintstones?”

Doing beef ribs can be a challenge.  As a BBQ, they are amazingly beefy, flavorful, and will stand up to just about any kind of rub, sauce, or dressing you care to put on them.  On the down side, though, they can be stringy, tendon-y, and tough as shoe leather.  Cooking on an open grill is a special challenge due to the lack of heat control.

Let me say up front, no, we don’t precook them in a conventional oven for hours and no, we don’t boil the things.  Boiling will render the meat tender.  It will also render it rather flavorless.

There are four keys to getting good grilled beef ribs.

First: Remove the membrane.  This is a solid sheet of protein on the back side of the ribs.  Exposed to heat, you could bungee jump using the thing.  To peel it off, use a blunt knife like a butter knife to loosen the edge at the end of one of the bones, grab hold of the membrane (using a cloth, paper towel, fish skinner, or pliers will help you hold on to it.  Trust me.) and gently rip it off.  It's a pain in the butt, but the payoff is you get to keep most of your teeth at dinner.

Second:  Brining:  You can use either a wet brine (water, salt, sugar) or a dry brine (a simple salt rub).  We use the latter, rubbing the meat with salt all over the night before.  Brining does some wonderful chemical tricks with the meat, allowing the surface to hold onto more water during cooking and making the meat far more moist and tender.  We use the same trick with chicken and pork, always to good results.

Third:  The Rub.  Our Middle River Rub recipe is included below.  Give yourself time for the rub to sit on the meat for at least an hour or so.
 Yeah we made a LOT of rub for the Labor day party
 No, not wine, just a used bottle with olive oil
Ahh, the joys of the Middle River Rub


Fourth:  Low and Slow:  These things take some time to cook.  A couple of hours is desirable at around 180-200 degrees F.  

To keep the temperature in line, we use aluminum pans to cover the meat and a water filled drip pan directly under the ribs, with the fire used as indirect heat around the fringes.  Need additional control?  Toss another tin pan over the coals to damp down the heat a bit.


Even with the best of cooking, Beef Ribs can be at the very least firm flesh, not the sort of buttery, melt off the bone texture you get with pork, but the flavors are exceptional bordering on amazing.  With a good rub and slow cooking, they’re a treat.  Besides, you get to feel like Conan the Barbarian ripping the flesh off the bones.  Now what could be better than that?


Middle River Rub:

First, rub the (hopefully brined) meat with lemon juice and olive oil.

The Rub:

(takes about 4-6 TBL of the rub per rack of beef ribs, but you should use as much as will stay on the meat)

3 TBL Smoked Paprika
3 TBL ground chili (ancho is what we used.  1 Large Dried Chili is about enough)
3 TBL Black Pepper
3 TBL Brown Sugar

1 TBL Garlic Powder
1 TBL Cumin Seed
1 TBL Mustard Seed

1 tsp Ground Ginger
1 tsp Ground Allspice

1/2 of a whole nutmeg, grated

As much hot pepper flakes as you wish.  We used about 1 TBL

First toast the Chili, cool, and grind.  Then toast the cumin seeds until fragrant, toast the mustard seeds until they begin to pop.  Grind these as well.

Mix cooled dried ingredients and put in a sealed container.


Then drive your neighbors crazy with the smell of these cooking.  Yum.

Hey, check out our other blogs and the sagas of the Shantyboat "Floating Empire" over at floatingempire.blogspot.com and Life, Art, Water, you'll be glad you did :)

More stuff shortly

M

Thursday, August 28, 2014

PIZZA! Oh yes.....

I'd be remiss if I didn't include this:  As you've probably gathered, we love using dutch ovens for stuff, both aboard and on the charcoal grill.  They're a really versatile tool, virtually immortal, and can make some tasty stuff.

One of our favorite things is do make breads in the dutch oven.  We do crusty bread to go with meals, foccaccia, and KILLER pizzas, all from the same recipe:

So here's what you do:  In a bowl mix:

3 Cups of Flour (your choice, everything seems to work pretty well)
1TBL salt
1/2 tsp of yeast
and about 1 1/3 cups of water (the water will vary with the humidity and how dry the flour is)

Mix together to make a sticky dough.  Don't overwork, just completely combine the ingredients.  Then cover the bowl with a cloth and ignore it til tomorrow.

The next day you will have a larger amount of an even STICKIER dough.  If you're making bread, flour the living daylights out of your hands and form it into a ball (again, don't overwork) and place on a floured towel or cloth and cover.  If you're doing pizza, I'd recommend dividing the mass, putting half in an oiled ziplock back in your ice chest for tomorrow and let the remaining dough sit covered.

Let em sit for at least two hours.

Now, the dutch oven.  There are a couple of kinds you can use.  We have both the traditional kind intended to sit on coals and more modern ones.  The traditional ovens have legs under them and have a lid with a lip so the coals can stay on top.  We also use a "chicken fryer" which has a lid which is also a frypan.  That's the one we use for pizza, though both will work.

Oil the pan well and stretch out your dough to match.
Then dress with your favorite ingredients.  We like to sautee our vegetables first before adding them. If you REALLY like loading up the pizza, cook the crust for a bit first before adding stuff.

While that's going on, heat the top of the cooker.  You're using this as a bake oven, remember, not as a frypan.


Then place the flat pan on the coals (you don't need to overdo the fire here, about 8 coals will do it for the bottom) put the larger pan on top, and add 8-10 coals to heat.  


While this can vary a lot in cook time depending on your ingredients, in about 15 minutes you'll have a wonderful pie, with a lovely browned crust and wonderfully melded flavors.

Seriously, guys, this makes for killer pizza.  We use fresh tomato when available, local sausage, sauteed onion, pepper, and garlic and a nice topping of mixed cheeses (mozzarella and romano work well).

Next foray into this well tell you how to make a great foccacia bread or just a nice crusty loaf for eating.

Enjoy.
M

Hey, check out our other blogs and the sagas of the Shantyboat Floating Empire over at floatingempire.blogspot.com and Life, Art, Water, you'll be glad you did :)

Monday, August 18, 2014

Compact Tools for Small Kitchens

I thought I'd take a moment to show you some of the space saving things we've done here aboard Floating Empire that might work in your small kitchen.

First of all, when not using the hearth, we use one of these single burner catering stoves.
The units are inexpensive (I found ours on the web for all of $10 apiece), compact, self lighting, will take a full sized stockpot or cast iron frying pan securely, and the butane burns quite a bit hotter than propane, so you can get a better sear, faster boils, etc.  The only downside is that the fuel can be a bit tricky to find at times.  Fuel is cheap on the web (as low as $1.50 a can) but we've been charged as much as $7 at marinas when we could find no other source.  Just keep your stock up and you're fine.

For grinding coffee (well, ya gotta) and fresh pepper and spices (well, ya should), we use one of these little Kitchen Aid grinders with removable containers.  It works well and provides us with a way of NOT mixing, say, the flavor of deep roast columbian with the flavor of tandoori spicing.

The most useful toy we've found was the addition of a stick blender in place of a regular bar blender.
They'll do about anything a bar blender will do, from smoothies to iced drinks to blending  cream soups, take up very little room, and are easy to clean.
See?   They break down into a really compact space, and only the blade section needs to be cleaned.  They can do wonderful stuff like making smooth soups out of your leftover cooked vegetables:
Not to mention their utility at turning ice, fruit and rum into some really interesting mixed drinks.

More recipes and ideas shortly, so stay tuned.  And, hey, comment and subscribe, we'd love to hear ideas from you, and we promise to respond.

M

Friday, August 15, 2014

PANZANELLA!

Morgainne makes the classic Italian bread salad in the galley of Floating Empire.


Join us in our other blogs, Floating Empire and Life, Art, Water, you'll be glad you did.

M

Monday, August 11, 2014

Spots before our eyes

...or the charm of "trash fish"

This is a tale of the lowly, prickly, and often delicious Virginia Spot, a fish widely used by fishermen for bait and by locals for lunch.  The fish is small, usually under a pound and less than 5 inches in length, and distinguished by a coloration fading from steel grey on the dorsal to yellow in the ventral side and by a large, eye-like spot behind the gills.  They are often referred to as Spots, or Spot Croaker,  or Croaker Spots.  Like most fish around the Chesapeake, they spend their winter adult lives in the Atlantic and are caught there in nets or with worms, and then they migrate into the brackish waters of the bay and its estuaries to spawn and grow....

...wherein six of them ran afoul of my crab traps.

You know, it seems everywhere I've lived, there are some little swimmers that get derided as "trash fish" or "bait fish" that, if you dig a bit, you discover the locals have been eating for centuries.  Look, guys, unless a fish is poisonous (like Fugu) or raised in a toxic environment, it's edible, and some of the smaller, bonier varieties have amazing, delicate flavors.  Now as to the lowly spot:

The Spots are small, with spiny fins, and a bit of a bear to clean.


I've read dozens of recipes on how to prepare these little things, but the one we went with was this:  Scale and gut, removing the fins.  We then tossed them in flour (so the egg will stick), then in an egg wash (so everything else will), then in cornmeal spiced with salt and a generous amount of pepper.

As its summer, we're doing a lot of outdoor cooking in the dutch ovens, which make great fryers.  You just plop the little rascals in, turning occasionally, and fry until golden brown.
A bit of fresh corn never hurts either :)

Now for a bit of a simple side, we did a bit of cole slaw.
And for this one I have to thank Erik over at Garden Fork, a great site for recipes and DIY if you don't know it.


 This is so simple:  Head of cabbage, two carrots(both shredded), half a cup of good olive oil, 2 tbl apple cider vinegar, 2 tbl maple syrup (Erik uses 4, but I find that a bit sweet), salt and pepper.....
and a good tablespoon full of caraway seeds.  Blend well and set aside to mellow for at least an hour.  It just gets better with time.

Yum

The fish is delicate and sweet, with a flavor very much like really good fluke, but bony, so be careful.  We've also heard they make GREAT fishcakes.

More shortly

M


Thursday, August 7, 2014

Country Ribs w. Sweet Potatoes and grilled Tomatoes

I had really intended to do more video or at least more pictures of this meal, but we fell to discussing an upcoming event (and dinner) at the Marina, so you get the barest of images….

But the meal turned out so well and was so simple that I really felt I should pass this along.  This cooks on a single outdoor grill (closed is best), on a single heat of coals.

(Morgainne wishes me to note that all measurements are estimates and you need to adjust to your tastes)

You will need for 2 people:
Country ribs (rapidly becoming my favorite cut of pork, these are inexpensive, largely boneless, and yummy)
A large ripe tomato
2 medium sweet potatoes
1 medium sweet onion
garlic (about 4 cloves)
rosemary
salt and pepper
basil

A cantaloupe or other ripe melon
some chocolate
balsalmic vinegar

And for the sauce:
olive (or other ) oil for sautee
onion (part of the one for the rest of the meal, finely chopped)
about 3 cloves of garlic
1 tbl of mustard seeds
salt
black pepper
1/2 fresh jalapeño, diced
1/4 cup of tomato catsup
2 tbl baker’s molasses (not black strap)
2 tbl cider vinegar
a splash of worcestershire sauce

and for the brine:
1/4 cup sugar
1/4 cup salt
1 qt. potable water

Start by brining your pork, at least an hour ahead of time, three is better, overnight is overkill.  Mix your salt and sugar in a qt of water and immerse your pork, turning occasionally.  Brining makes a huge difference in most meats, rendering them tender and succulent and facilitating the absorption of sauces and spices into the meat.

Start your coals.  We prefer to use lump charcoal, but briquettes will work just fine too.

First, in a small pan, make your sauce.  Sautee the onion until clear, add your garlic, mustard seeds, and the diced jalapeño and sautee for about five minutes.  Add your remaining ingredients, salt and pepper to taste, bring back to a simmer to help it meld and reduce a bit (simmering until you get the consistency you like) , and then set it aside.

Cube your onion and potato, toss with oil, a bit of garlic, pepper, and rosemary.  Put in a slotted grill pan if you have one, and cook until it begins to get color.  Some nice caramelized brown patches really enhance the flavor.  When the potatoes are tender, remove to a covered plate or bowl.

Pat dry your pork, oil lightly, and drop it on the hot grill.  Turn it after about two min (you should be hot enough to see grill marks) and paint with your BBQ sauce.  Continue until just before done to your liking.  Set aside, covered, to rest.

Cut two THICK slices of the tomato, dress with a bit of oil and a LOT of basil, and either use your slotted pan or drop them directly on the grill.  Sear until tender.

Bring your remaining (if any) BBQ sauce up to a simmer for serving with the meat.

Dress your tomatoes on the the plate with a bit of balsamic vinegar, then serve with your potato and onion roast and the pork.

The flavors are amazing, the pork will be tender and spicy, the potato dish heavy with rosemary and aromatic, sweet garlic.

….don’t even get me started on the tomatoes.

Now dessert:  Mix up some chocolate….it can be from cocoa powder or using a chocolate syrup, with a bit of sea salt and some balsamic vinegar.  Cube up some ripe melon and either drizzle the chocolate/balsalmic glaze over it or use it as a dipping sauce.  

The meal, including a glass of decent wine, runs about $5 per plate or less, and you can do it on a single grill or burner.

enjoy

M


Tuesday, August 5, 2014

Morgainne makes a Pan Sauce (gravy to you Americans)

So here's a simple pan sauce aboard the galley of Floating Empire to accompany a meal of roasted chicken (store bought) and homemade colcannon (potatoes and cabbage, an Irish classic).

Enjoy


We're still working on the video quality, so plan on some better lighting and framing in future iterations.

Also please check out the adventures aboard the MV Floating Empire in our Floating Empire blog and Morgainne's blog of an artist's life on the water at Life, Art, Water

enjoy
M

Decadent eating in limited spaces

So this is a bit of an introduction to what is going to be yet ANOTHER blog we're creating just for cooking aboard vessels and in tiny homes and Vardos.  We're calling it Onboard Cooking, and we're going to explore all kinds of campsite, vessel, trailer, tiny apartment, tiny home, tiny spacecraft, tiny submarine....you get the idea....cuisine.

Eating well is one simple decadence in which any one may indulge.  It only takes a bit of invention and research.  I hear so many people complaining that they'd love to make a decent meal but they only have one burner, or they have no refrigeration, or it's too hot out, or it's too cold out, or they're broke......

....trust me, we've been ALL those places.

And yet we've been able to make really amazing food in limited circumstances.  Full disclosure, we're not only both foodies, we're also living history re-enactors, with a knowledge of older ways of prepping foods, and we're former restaurant owners and caterers, with a great love of eclectic and fusion cuisines.

Take yesterday as an example.  The day was fine, and we hit a lot of the local farmstands for fresh--and inexpensive--food for dinner.  Fresh Zucchini, fresh eggplant, onions, garlic, corn....one of the wonderful things about being around the Chesalpeake is the food.

This time we chose to make dinner on shore, using one of our faves, the dutch oven.  We sauteed chopped onion, garlic, mushrooms, a bit of ground turkey, and some of the scraped out innards of the eggplant in the pot, spicing liberally with toasted cumin and coriander, oregano, thyme, basil, salt and pepper and paprika and a tad of orange zest.  Cinnamon, allspice, or nutmeg would also have been a good taste match.


 We added the filling to the hollowed out eggplant halves


 Placed in the heated dutch oven
 And topped with fresh diced tomatos


 And a mixture of romano, mozzarella, and panko bread crumbs
 Then you bake, about 15 min.  This really only takes about 20 coals to do the whole meal.
 wow
 wow and yum

 And this was the dining room.
And we hated it as you can see.  We're driving the rest of the folks in the marina crazy with the smells of our cooking.

If that seems elaborate, think again.  It was only an eggplant, some onion and garlic, and a bit of frozen ground turkey, and some spices.  The difference between the mundane and the spectacular is just a bit of invention.  

So please visit our original blog Floating Empire to follow our adventures on the water, Morgainne's blog Life, Art, Water for an artist's life aboard, and our new blog Onboard Cooking for great ideas on cooking fine food in limited spaces.  In future I promise more how-to videos, recipes, cooking gear, and lots and lots of great food.

This boat livaboard adventure has been a really great experience for us.  Come share it.

M